A coffee bag artwork guide helps brands prepare print-ready files after the pouch structure, dimensions and functional features have been confirmed. Starting the design too early can lead to misplaced text, incorrect panel dimensions, blocked valve areas and expensive artwork revisions.
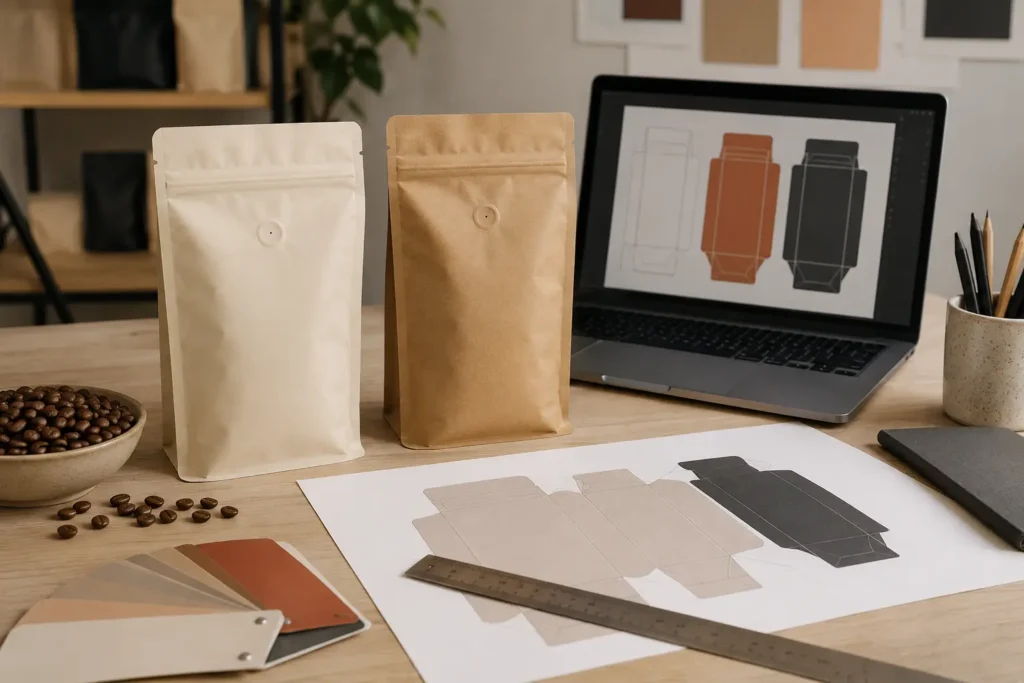
Quick Answer: How Should Coffee Bag Artwork Be Prepared?
Confirm the bag style, dimensions, zipper, valve, tear notch and sealing areas before beginning the final artwork.
Then request the approved dieline and prepare the design using the required color mode, image resolution, bleed, safe areas and file format.
Before printing, check:
- Bag dimensions and panel layout
- Front, back, side and bottom panels
- Zipper and tear-notch positions
- Valve location
- Heat-seal areas
- Gusset folds
- Bleed and safe zones
- Image resolution
- CMYK or Pantone colors
- Fonts and linked graphics
- Barcode size and contrast
- Required product and market information
- Number of designs and size variations
The final file should be reviewed technically by the packaging supplier and approved by the customer before sampling or production.
Why Bag Specifications Must Be Confirmed Before Artwork
Coffee bag artwork cannot be prepared accurately without an approved packaging structure.
A stand-up pouch, flat bottom bag and side-gusset bag have different panels, folds, seals and printable areas. Even two bags with the same filling weight may use different dimensions because of coffee density, required headspace and brand presentation.
Before creating the final artwork, confirm:
- Coffee format: whole bean or ground
- Target filling weight
- Bag style
- Final dimensions
- Material structure
- Zipper requirement
- Valve position
- Tear-notch position
- Top-seal allowance
- Printing method
Artwork prepared on an estimated or incorrect dieline may need to be repositioned after the dimensions are finalized.
For projects where the bag dimensions are still being reviewed, consult our Coffee Bag Sizes Guide before preparing the final design.
What Is a Coffee Bag Dieline?
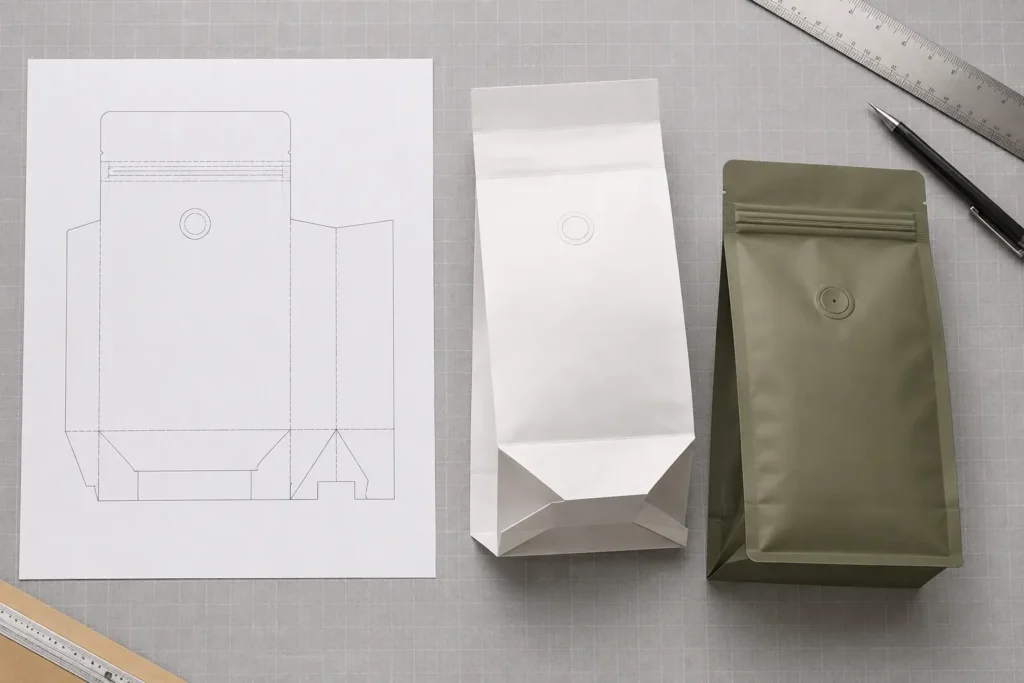
A dieline is a technical layout showing how the printed packaging will be formed, folded and sealed.
It provides the working areas for the designer and may show:
- Overall bag dimensions
- Front panel
- Back panel
- Side gussets
- Bottom gusset or bottom panel
- Fold lines
- Seal areas
- Zipper position
- Tear notches
- Valve position
- Bleed area
- Safe area
- Registration or production marks
The dieline is not simply a visual template. It represents the physical construction of the finished pouch.
The designer should use the approved dieline without changing its scale, proportions or technical lines unless the packaging supplier confirms a revision.
Understanding Coffee Bag Panels
The number and shape of printable panels depend on the bag structure.
Stand-up pouches
Stand-up pouches normally include front and back panels with an expandable bottom gusset.
Important artwork considerations include:
- Keeping key information away from the bottom fold
- Checking how the artwork continues into the gusset
- Allowing space for the zipper and top seal
- Confirming the valve position
Flat bottom coffee bags
Flat bottom bags may include front, back, two side panels and a bottom panel.
This provides additional branding space, but it also requires careful alignment across panel edges and folds.
Designers should confirm:
- Which panel will face forward
- How side-panel information is oriented
- Whether artwork crosses sealed edges
- How the bottom panel will appear after filling
- Valve and zipper positions
Side-gusset coffee bags
Side-gusset bags include front and back areas with folding side gussets.
Important information should not be placed where it may disappear into a fold or become difficult to read after the bag is filled.
The orientation of side-panel text should also be confirmed before approval.
What Are Bleed and Safe Areas?
Bleed extends the background color or image beyond the final visible or trimmed area. It helps prevent unwanted unprinted edges caused by normal production movement.
The safe area is the zone where important text, logos, barcodes and design elements should remain to reduce the risk of being affected by seals, folds, trimming or production tolerances.
The exact bleed and safe-area requirements depend on the bag structure, printing process and manufacturing partner.
Designers should not assume one universal measurement for every pouch. The approved dieline and technical instructions should be followed.
Where Should the Logo and Main Product Information Go?
The main logo, product name and key selling information are usually placed on the primary display panel.
Before finalizing their positions, consider:
- How the filled bag stands on a shelf
- Which panel faces the customer
- Whether the top may be folded, sealed or trimmed
- Whether the bottom gusset expands
- Whether the side gussets remain visible
- Where the zipper and valve are located
- Whether the package will be photographed or displayed online
Important design elements should remain clear when the bag is filled, sealed and viewed from a normal retail angle.
Planning Artwork Around the Degassing Valve
A one-way degassing valve occupies a physical area on the coffee bag. Its position must be included in the approved dieline.
Avoid placing the following directly over or too close to the valve:
- Small text
- Logos
- Faces or detailed illustrations
- Barcodes
- QR codes
- Certification marks
- Important product claims
The valve should also remain clear of the zipper, seals and intended filling level.
Valve position should be confirmed before final artwork approval because moving it later may require changes to the design.
For a detailed technical overview, read our Coffee Bag Degassing Valve Selection Guide.
Planning Artwork Around the Zipper and Top Seal
The upper section of a resealable coffee bag may include:
- Final top seal
- Tear-off area
- Tear notches
- Consumer opening area
- Zipper
- Valve
Text and design elements placed too close to these areas may be cut, folded, hidden or visually interrupted.
A finished bag may also be slightly shorter than the flat artwork appears because part of the upper section is used for sealing and opening.
The designer should review the functional zones shown on the dieline rather than treating the entire file as equally printable display space.
How Gusset Folds Affect the Design
Gussets expand after the bag is filled. Artwork positioned inside a gusset may appear differently when the bag is empty, partially filled or fully filled.
Fine text, barcodes and important instructions should generally be placed on a stable and readable panel rather than across a deep fold.
When artwork continues from one panel into another:
- Check panel alignment
- Allow for folds and seals
- Avoid critical details on the boundary
- Review the filled-package appearance
- Use a physical or digital mockup for orientation
A flat design file cannot fully represent every fold and curve of the filled package.
CMYK vs Pantone Colors for Coffee Bag Printing
CMYK
CMYK printing combines cyan, magenta, yellow and black to reproduce a broad range of colors.
It is commonly used for:
- Photographs
- Gradients
- Multi-color illustrations
- Full-color packaging artwork
Colors displayed on a computer or phone screen use light and may not match the final printed result exactly.
Pantone colors
Pantone references may be used when a brand requires a specific spot color or a more consistent color target.
Their availability and practical use depend on:
- Printing method
- Material
- Surface finish
- Number of colors
- Order quantity
- Manufacturing specifications
A Pantone reference provides a color target, but the final appearance may still vary according to the substrate, ink, laminate and finish.
Which should a coffee brand choose?
CMYK may be suitable for artwork containing photographs, gradients and multiple colors.
Pantone references may be considered for important brand colors or selected solid-color designs.
The final choice should be coordinated with the printing method, design and quotation.
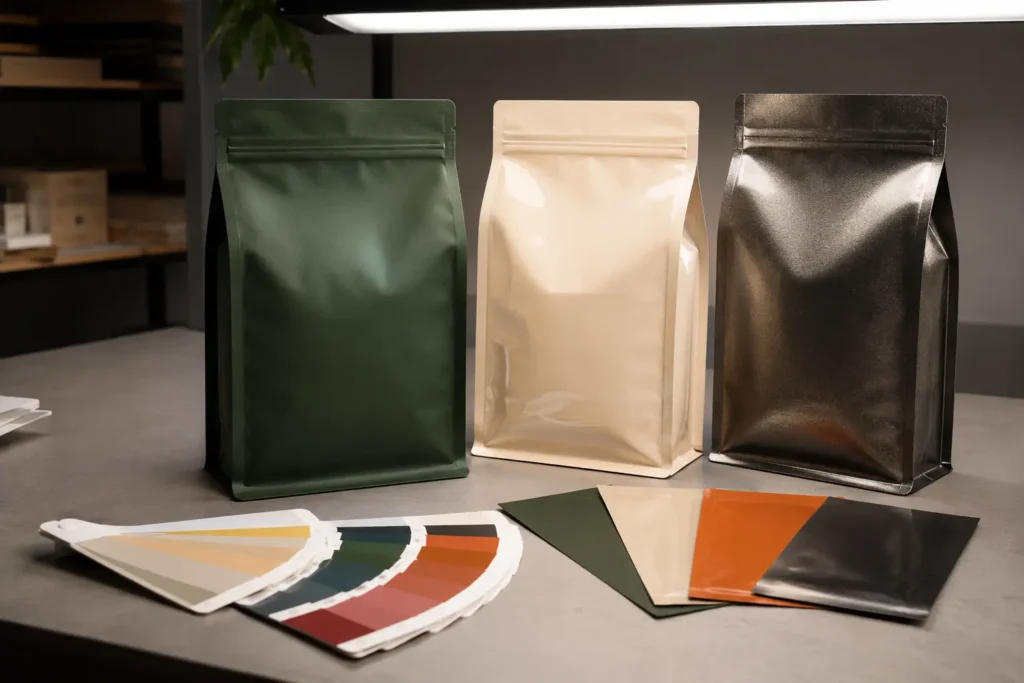
Why Material and Finish Change Printed Colors
The same artwork may look different when printed on:
- White film
- Kraft-style material
- Metallized film
- Transparent film
- Matte surface
- Glossy surface
- Soft-touch surface
A white film generally provides a different color base from kraft or metallic material. Transparent areas and white-ink layers may also affect the finished appearance.
Matte finishes can make colors appear softer, while glossy surfaces may increase visual contrast and reflection.
The material, ink layers, printing process and surface finish should therefore be reviewed together.
What Image Resolution Is Needed?
Photographs and raster graphics should have sufficient resolution at their final printed size.
Low-resolution images taken from websites, screenshots or messaging applications may look acceptable on a screen but become blurred or pixelated in print.
Designers should:
- Use original high-resolution images
- Avoid enlarging small raster files excessively
- Check effective resolution at final size
- Keep linked images available
- Avoid using compressed screenshots as final artwork
The exact file requirements should be confirmed with the packaging supplier or printer.
Fonts, Outlines and Linked Files
Missing fonts can cause text to change when the artwork is opened on another computer.
Before submitting the final file:
- Convert approved text to outlines when requested
- Keep an editable master file separately
- Include linked images and graphics
- Check that no fonts or links are missing
- Confirm all spelling and product information
Once text has been converted to outlines, editing becomes less convenient. The customer should retain an editable version for future changes.
Barcode and QR Code Considerations
Barcodes and QR codes must remain clear, sufficiently sized and positioned on a suitable background.
Avoid placing them:
- Across folds
- Across sealed edges
- On deeply curved areas
- Directly over the valve
- Too close to trimming or seal zones
- On backgrounds with poor contrast
A digital design preview does not guarantee successful scanning on the finished package.
The customer is responsible for providing the correct barcode data and should test the printed code under the intended retail and distribution conditions.
Required Product and Market Information
Coffee packaging may require information such as:
- Product name
- Net quantity
- Ingredients, where applicable
- Allergen information, where applicable
- Roaster, brand owner, importer or distributor details
- Country-of-origin information
- Lot or date coding area
- Storage instructions
- Preparation information
- Nutrition information, where applicable
- Recycling or disposal information
- Applicable certification or claim information
Requirements vary by product and destination market.
Jinhong Packaging can coordinate technical artwork checks related to the pouch structure and printing process. The customer, brand owner or responsible market operator remains responsible for confirming the accuracy and legal compliance of product claims, labeling, barcodes and market-specific information.
Digital Printing vs Gravure Printing Artwork
Both digital and gravure printing may be available for custom coffee bags, depending on the specification and quantity.
Digital printing
Digital printing may be considered for:
- Smaller production quantities
- Multiple designs
- Seasonal products
- Market testing
- Projects without conventional printing cylinders
Artwork should still meet the required color, resolution, bleed and dieline specifications.
Gravure printing
Gravure printing may be considered for:
- Larger production quantities
- Repeated orders
- Consistent high-volume production
- Projects using dedicated printing cylinders
Each color and design configuration may affect cylinder requirements and setup costs.
The suitability of each method depends on the bag structure, material, colors, quantity per design and manufacturing partner.
How Multiple Designs Affect Artwork and MOQ
Coffee brands may have different origins, roast profiles, flavors or seasonal editions using the same bag structure.
Before requesting a quotation, confirm:
- Total number of designs
- Quantity for each design
- Whether dimensions are identical
- Whether materials and finishes are identical
- Which design elements change
- Whether variable data is required
The total order quantity and the quantity per design are both important.
Ten thousand bags divided across ten designs may have different production requirements from ten thousand bags using one design.
What Is an Artwork Proof?
An artwork proof is a file provided for checking content placement, orientation, colors, valve position and technical details before printing.
The customer should review:
- Product name and spelling
- Net quantity
- Artwork orientation
- Front, back and side panels
- Barcode and QR-code data
- Valve position
- Zipper, tear notch and seal areas
- Color references
- Number of designs
- Size and material specification
Proof approval confirms the reviewed layout for the next project stage. It is not a substitute for checking a physical printed sample when exact color, material feel or finished-package appearance is important.
Why a Physical Sample May Still Be Needed
A digital mockup can help review design placement, but it does not fully reproduce:
- Printed color
- Material texture
- Matte or glossy finish
- Metallic effects
- Bag stiffness
- Seal appearance
- Filled-package shape
- Valve and zipper operation
Available sample options may include:
- Existing printed samples
- Blank structural samples
- Digitally printed samples
- Custom production samples
Sample type, cost and lead time depend on the specifications and manufacturing process.
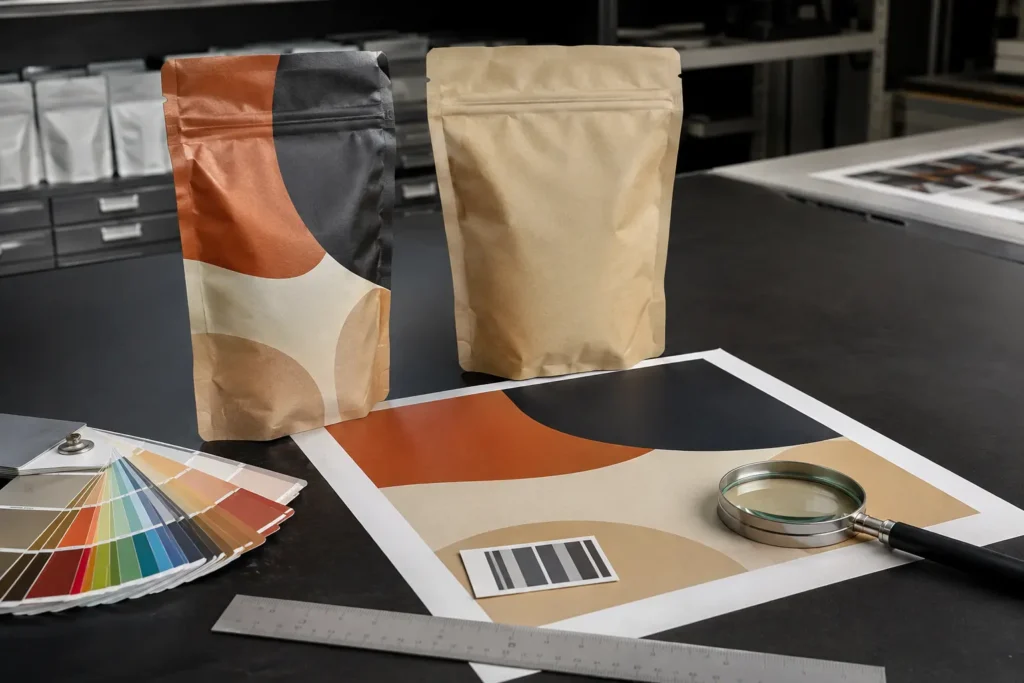
Final Coffee Bag Artwork Checklist
Before approving the artwork, confirm:
Packaging specification
- Correct bag style
- Approved dimensions
- Material structure
- Finish
- Zipper and valve requirements
- Printing method
Dieline
- Correct version
- Original scale retained
- Panel orientation confirmed
- Seals and folds identified
- Bleed and safe areas followed
Design file
- Correct color mode
- Sufficient image resolution
- Fonts handled correctly
- Linked files included
- Important elements inside safe areas
- No critical text across folds or seals
Product information
- Product name and net quantity checked
- Barcode and QR-code data checked
- Required labeling information confirmed
- Claims and certification marks verified
- Lot or date-code area reserved if required
Order information
- Correct number of designs
- Correct quantity per design
- Size variations clearly identified
- Proof reviewed and approved
- Sample requirements confirmed
What Files Should You Send for Review?
For efficient artwork review, provide:
- Editable vector artwork, where available
- High-resolution linked images
- Brand color references
- Logo files
- Font information or outlined text
- Barcode and QR-code files
- Product labeling content
- Number of designs
- Quantity per design
- Approved bag dimensions or current sample
- Required printing and finishing effects
AI, PDF and other professional design formats may be accepted depending on the project and manufacturing partner. Final submission requirements should be confirmed before sending the production file.
Frequently Asked Questions
Can I design a coffee bag before choosing its size?
You can begin the visual concept, but final artwork should not be completed until the bag style, dimensions and dieline are confirmed.
Can I use a Canva design for coffee bag printing?
Canva may be useful for creating an initial concept, but the final production file must meet the required dieline, bleed, color, resolution and technical specifications. Elements may need to be rebuilt or adjusted in professional design software.
Can you provide a coffee bag dieline?
A dieline can normally be coordinated after the bag structure, dimensions and key specifications are confirmed. Different manufacturing partners or bag-making processes may use different technical layouts.
Should I use CMYK or Pantone colors?
The appropriate option depends on the artwork, printing method, material, finish, order quantity and brand-color requirements. Confirm the color specifications before approving the production file.
Can the printer check my barcode?
The barcode can be reviewed for placement and print suitability, but the customer is responsible for providing correct barcode data and confirming that the finished printed code scans correctly.
Can artwork cross from the front panel to the side gusset?
It may be possible, but folds, seals and production tolerances can interrupt the design. Important details should not be placed directly across panel boundaries without technical review.
Do I need a printed sample before production?
It depends on the project, budget, timing and required level of confirmation. A physical sample is recommended when color, material, finish, dimensions or filled-package appearance is important.
Who approves the final artwork?
The customer or authorized brand representative should approve the final artwork, product information and proof. The packaging supplier can coordinate technical review and communicate printing requirements.
Planning Custom Printed Coffee Bags?
Share your bag style, dimensions, material, required features, artwork, number of designs, quantity and delivery destination.
Jinhong Packaging can coordinate dielines, technical artwork review, samples, production follow-up and delivery preparation through selected manufacturing partners.
Contact Jinhong Packaging to discuss your coffee bag artwork, samples and printing requirements.